Flat charts can feel dead, yet they create one of the clearest setups in crypto. A range in crypto trading appears when price moves back and forth between support and resistance instead of pushing into a lasting trend. That gives a trader a simple idea to work with - buy near the lower zone, sell near the upper zone, and protect the trade fast if the market breaks out.
These conditions can still offer usable opportunities, but they reward discipline more than speed. You need a clean trading range, realistic entries, and a clear stop before placing any Order on an exchange.
Below, the focus stays on how this Trading strategy works, how to spot a reliable structure, and how to map entries, exits, and Risk controls without overcomplicating the chart.
What Range Trading Means in Crypto
Range trading is a Technical analysis approach built for sideways price action. Instead of following strong Momentum, the trader works inside a horizontal channel formed by support and resistance. The usual plan is to buy close to the lower boundary and sell near the upper one. Some traders also short resistance and cover lower in the box.
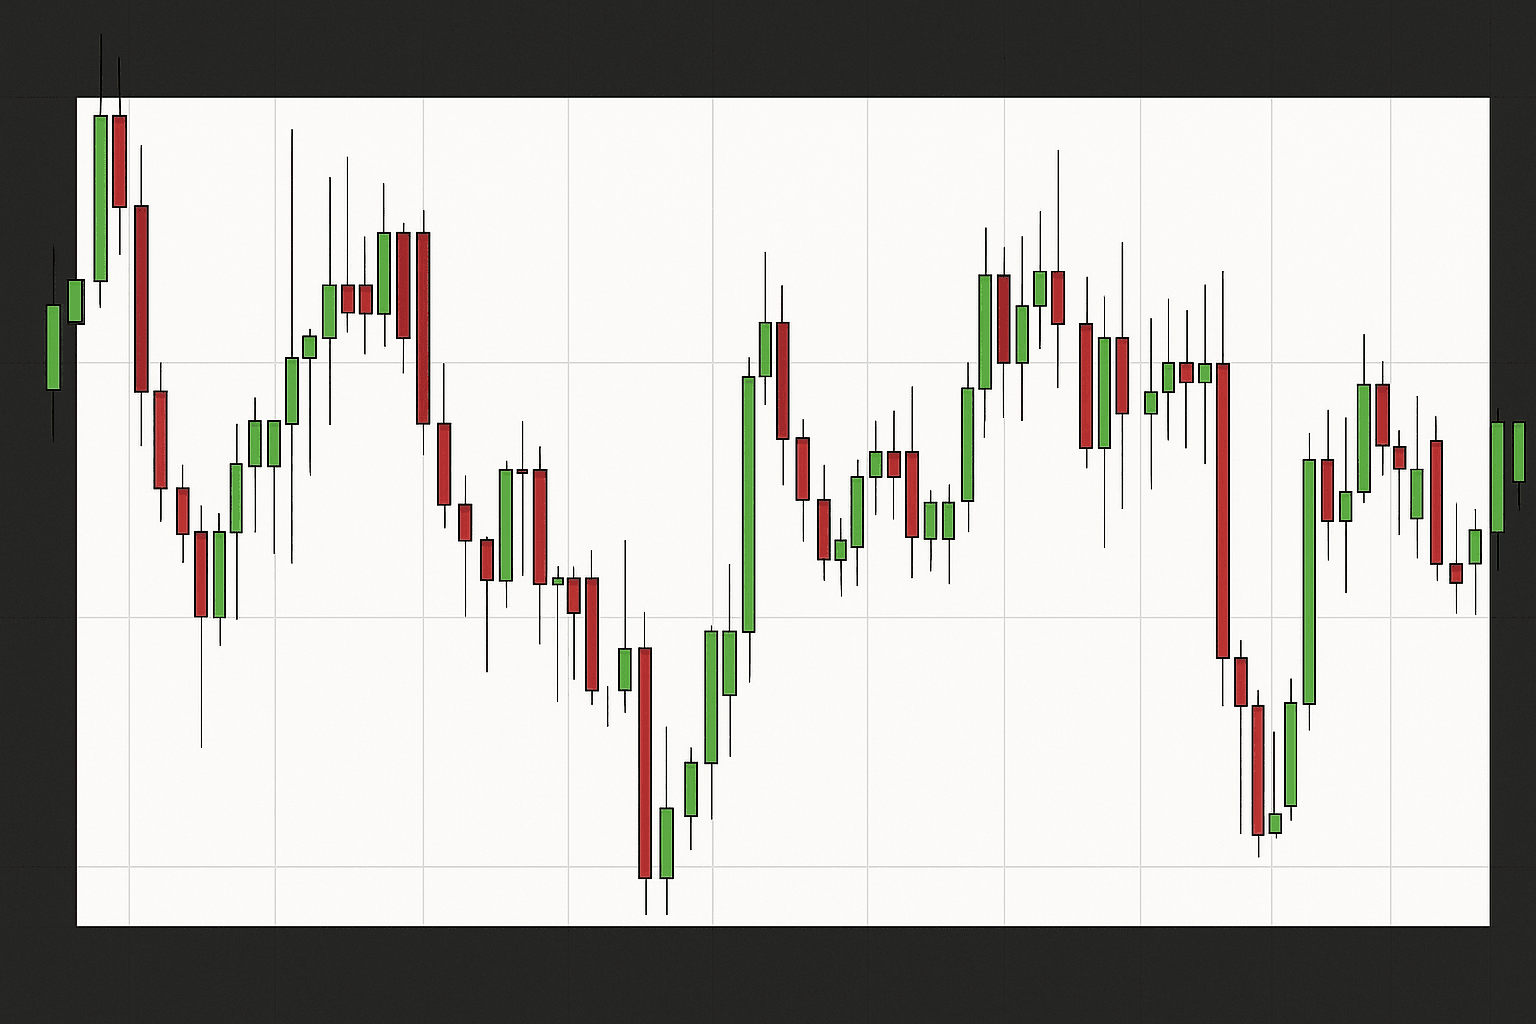
Those boundaries are rarely exact. On live charts, price tends to react within zones rather than at one perfect number. And every range eventually ends, so experienced traders treat the setup as a probability game rather than a certainty.
How the Process Works
The workflow is fairly repeatable. First, find a market that is moving sideways instead of trending. Then mark the support and resistance zones that define the range. After that, plan entries near one edge and exits toward the other, with stop-loss levels placed just beyond the area that would invalidate the idea.
Before getting into execution, it helps to know why some ranges hold together while others break apart quickly.
- Find a sideways market with repeated reactions at the same zones.
- Mark support and resistance, then wait for price to approach one edge.
- Choose the entry, invalidation, and target before placing the trade.
- Check volume or a timing tool such as RSI to see if the reaction still looks valid.
- Manage the position inside the box, or exit fast if price starts accepting outside the range.
Market Conditions for Range Trading
Spotting Sideways Action Versus a Trend
A sideways market usually prints highs and lows around similar levels. Price keeps oscillating, candles overlap, and momentum loses force. A flat or only slightly tilted moving average often supports the read that the market is stuck in a horizontal band.
Consolidation as a Pause After a Move
Many ranges show up after a sharp move higher or lower. Price slows down and enters consolidation while Volatility cools off. In practical terms, buyers and sellers are rebalancing positions, which creates repeated reactions near the top and bottom of the box.
Accumulation and Distribution Inside the Box
Some ranges form after weakness, with buyers quietly absorbing supply near the lower area. Others appear after strength, where sellers keep pressing price down from the upper band. You can also see pauses inside an ongoing uptrend where price rests before attempting another leg higher.
Volatility and Liquidity Matter
A range needs enough movement to cover fees and justify the Risk. A wider channel leaves more room for profit, though it usually takes longer to complete a full swing. A tight one may look tidy on the screen, but after spread and slippage it can become useless.
Liquidity matters just as much. Thin books make execution messy, especially in smaller Cryptocurrency pairs. Deeper markets tend to produce cleaner fills and more realistic setups.
Volume and Order Book Context
Trading volume shows whether participation is steady. Consistent activity often supports a healthier range. A sudden burst near the boundary can hint that one side is defending hard or that pressure is building for a breakout.
I usually take a quick look at the order book before entering a live trade. If depth looks thin or there are obvious gaps, the setup may be more fragile than the chart suggests.
Bullish Screen for a Range Setup
A simple bullish screen starts with price holding above a higher-timeframe support area while the local chart moves sideways. Inside that box, the lows should stay fairly even and dips into support should be bought back quickly. If RSI starts lifting from weaker readings near the lower boundary, the setup has a better case for a long from support than a random bounce in messy chop.
When to Avoid This Setup
Even a solid-looking range can fail when the environment turns unstable. Scheduled macro events such as CPI or an ETF ruling can blow through support and resistance in minutes. Exchange listing news on places like Coinbase can do the same, especially in smaller coins.
Regulatory headlines can shift sentiment fast and drain liquidity. The same caution applies to low-volume altcoins where spreads are wide and slippage eats the edge. If price is whipping around after a major move, or if the chart is clearly trending, this style of trade usually loses its advantage.
Core Parts of a Trading Range
Support as the Lower Area
Support is the floor where buying pressure tends to slow a decline. Range traders often look for entries as price approaches this zone, then place a stop a bit below it. If support breaks cleanly, the level can flip and act as resistance.
Resistance as the Upper Area
Resistance is the ceiling where sellers tend to reappear. Many traders reduce or close longs there, while aggressive traders may open shorts. Like support, it is better treated as an area than a single line. If price starts holding above it, the whole structure may be changing.
Range High and Range Low
The upper and lower extremes define the corridor you plan around. Draw them from repeated swing highs and lows, while ignoring one-off spikes that were never accepted by the market. Higher-timeframe levels often carry more weight.
The Midpoint and Mean Reversion
Most attractive entries sit near the edges, not in the center. The midpoint acts like a gravity area where price often drifts back toward average value. Some traders trim there or tighten exits if the move begins to lose energy.
Why Repeated Tests Matter
A useful range usually has several reactions from the same zones. Retests show that the market still respects the area. The more often price responds cleanly, the more confidence you can have in the structure.
How Long a Range Can Last
No horizontal market lasts forever. A range may hold for hours or stretch into days or longer, depending on sentiment and overall Volatility. It often ends when price starts closing beyond the boundary and volume expands.
How to Identify Ranges Step by Step
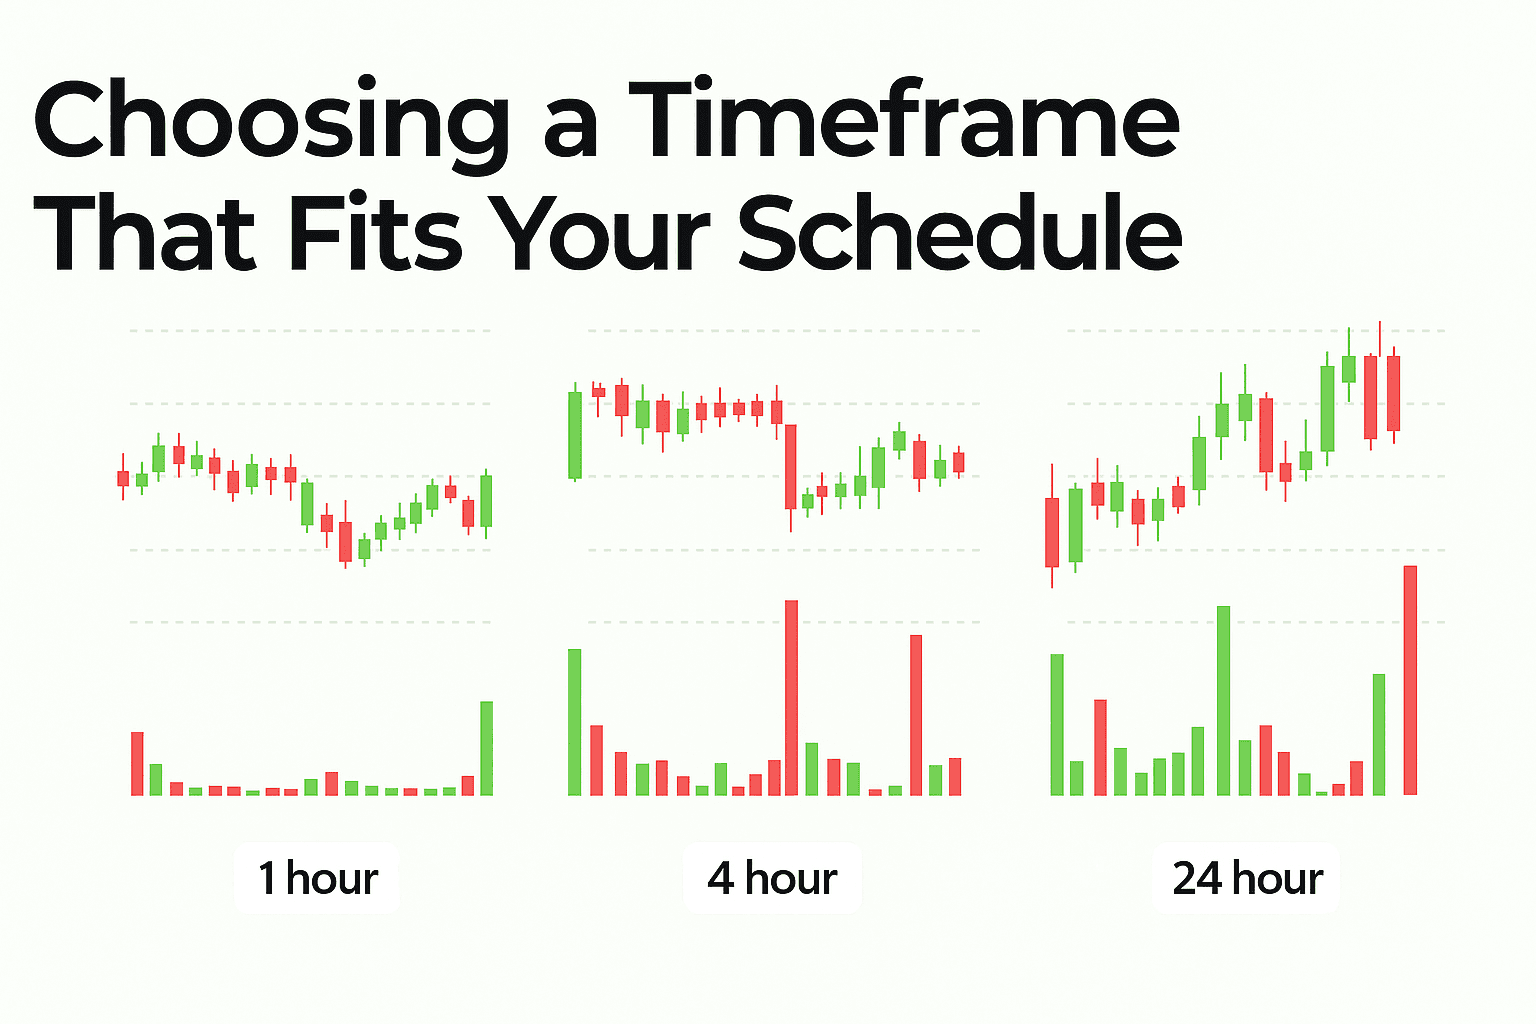
Choose a Timeframe You Can Actually Watch
Pick a chart interval that matches your routine. A 1H chart creates more signals, though it also adds more noise. The 4H chart is often cleaner, while the daily chart tends to produce slower and stronger structures. Use one main timeframe, then glance at a higher one for context.
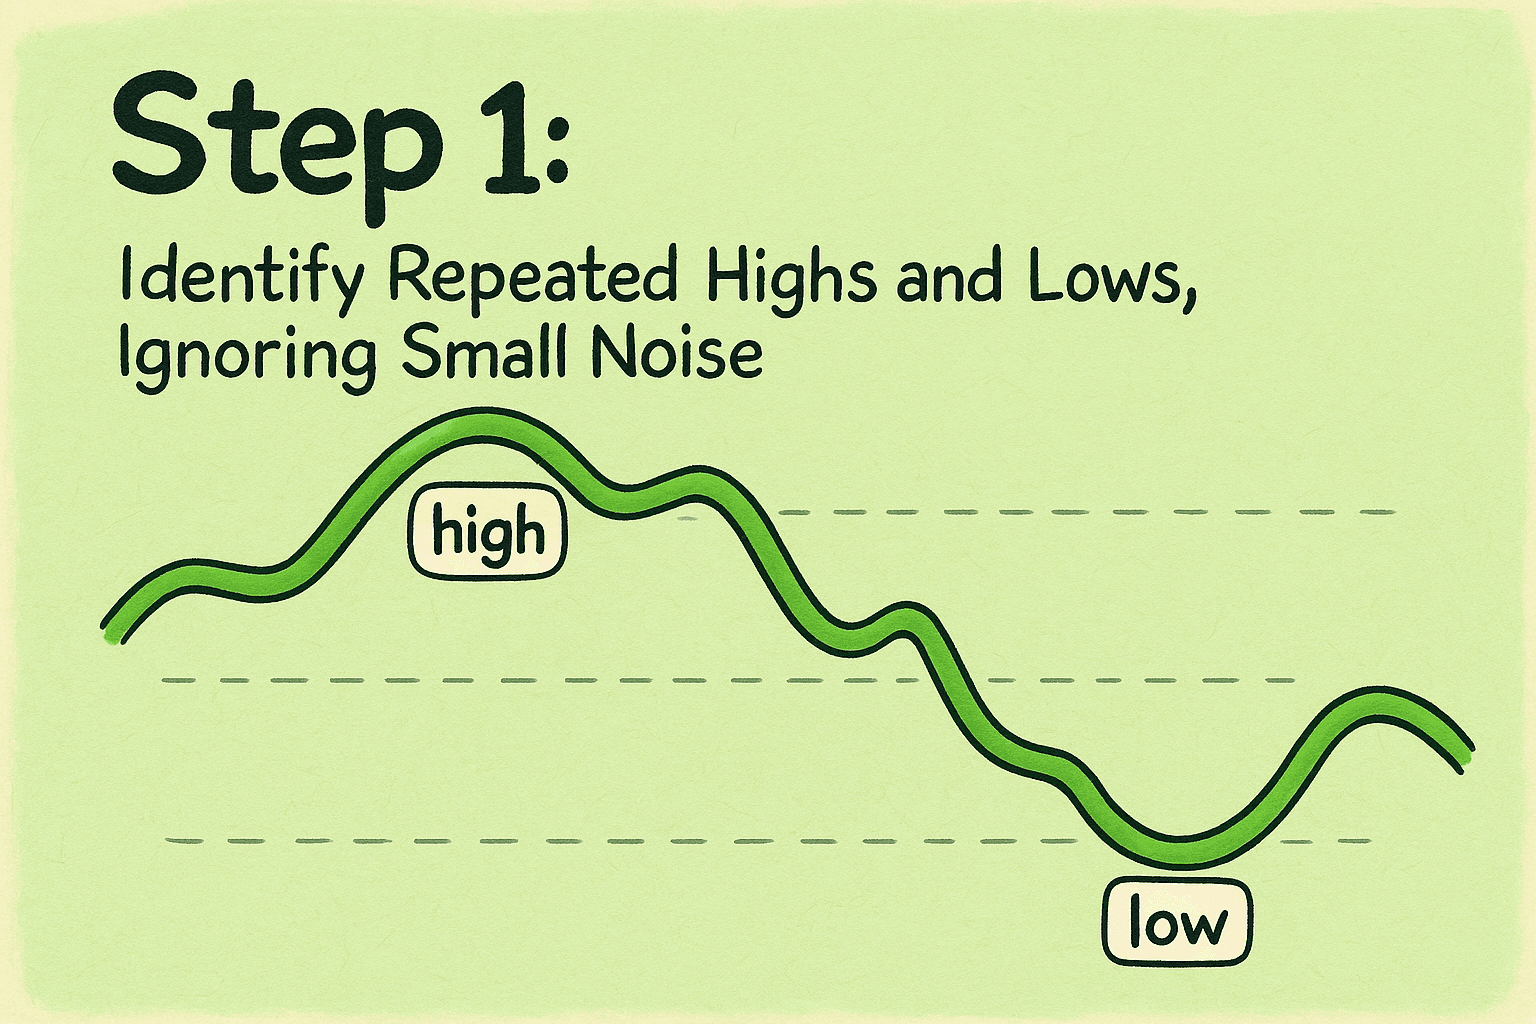
Step 1 - Find Repeated Highs and Lows
Look for at least a couple of obvious reactions near similar highs and lows. Focus on candles that reject a zone and move away with purpose. Small random wicks are less useful.
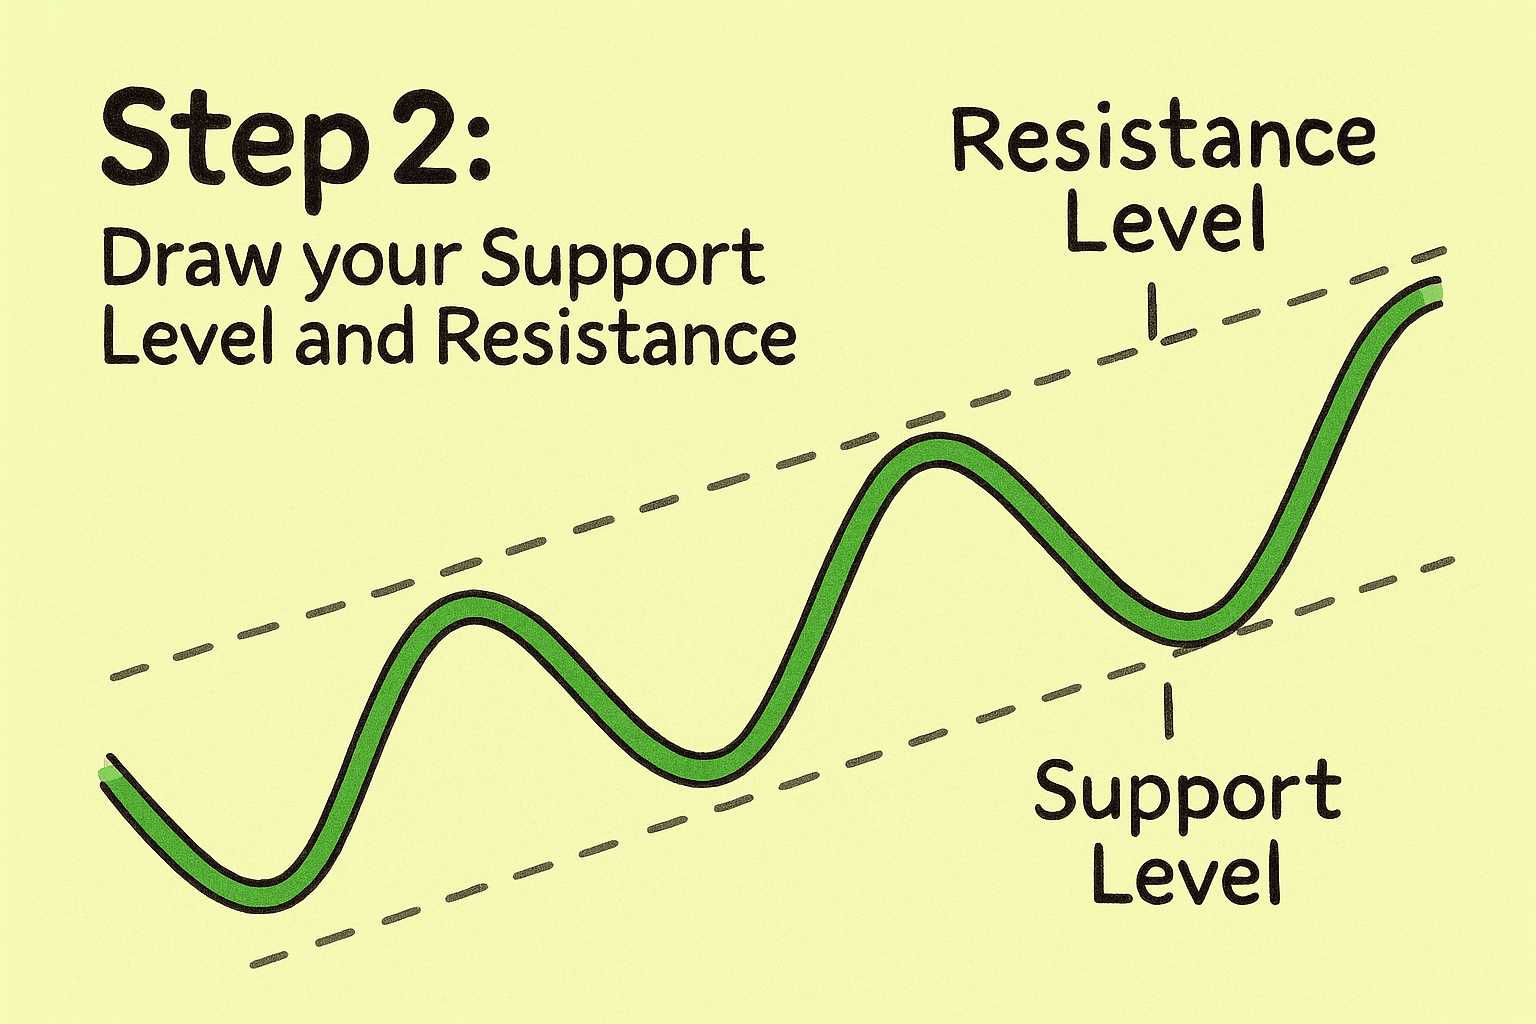
Step 2 - Mark Support and Resistance
Draw the lower and upper zones where price has reacted more than once. Extend them to the right and refine them as fresh touches appear. Think in terms of areas rather than exact numbers.
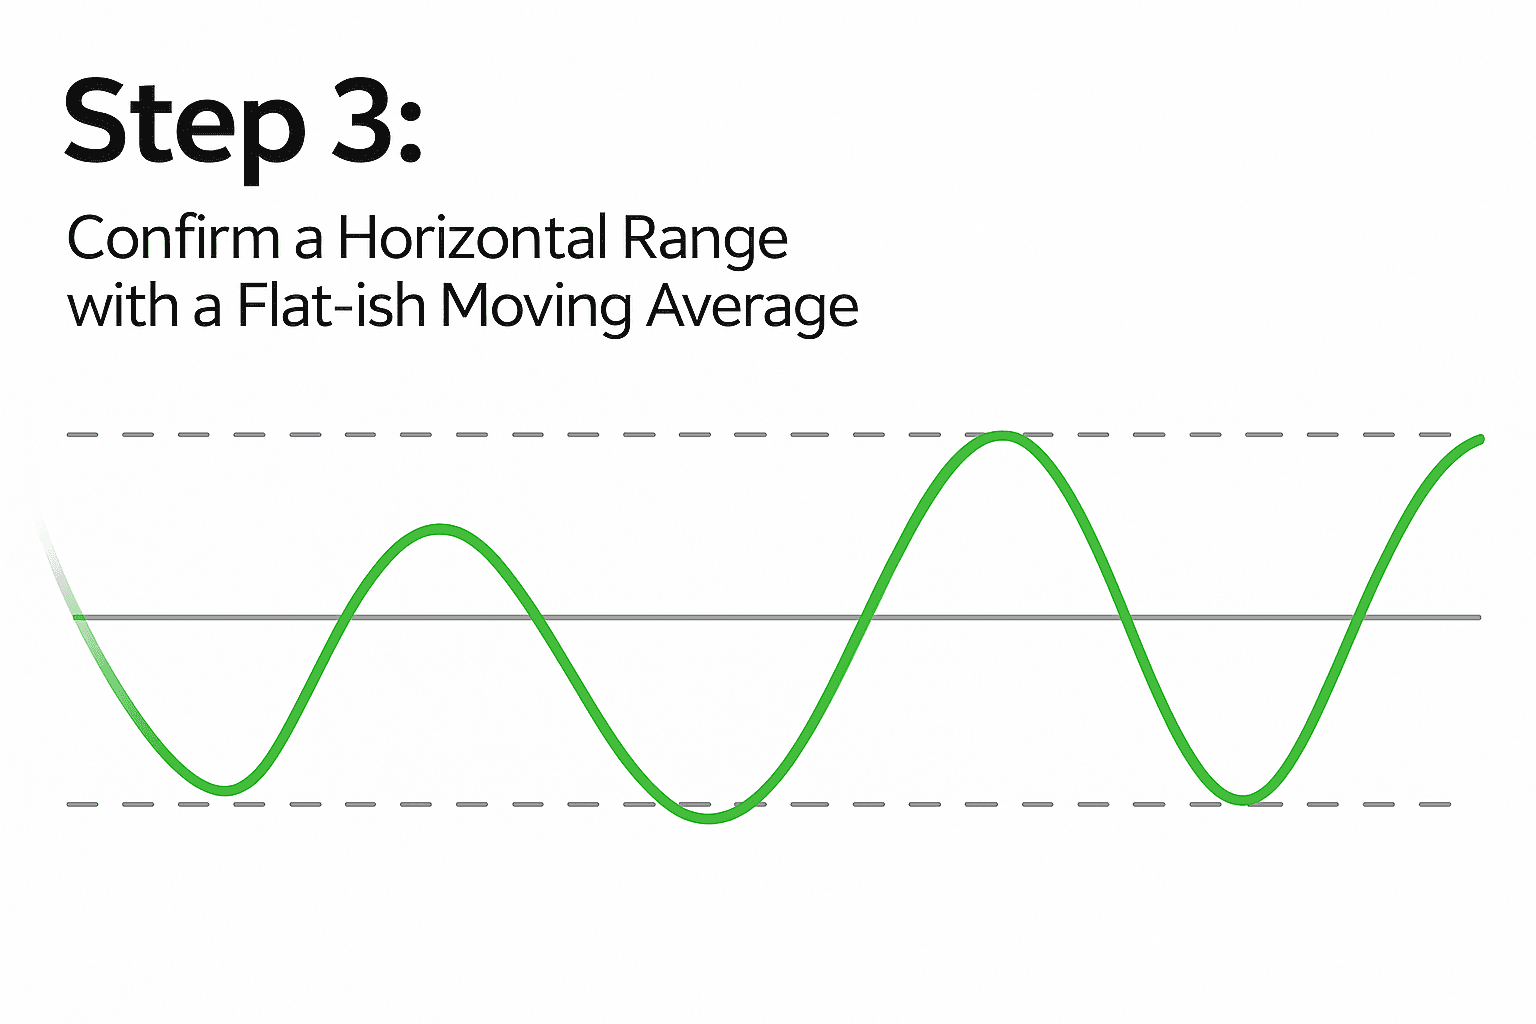
Step 3 - Use a Flat Moving Average as a Check
A flat-ish moving average can help confirm a sideways market. If price keeps crossing it back and forth, range conditions may still be intact. If the average starts sloping hard, trend conditions may be taking over.
Step 4 - Review Volume and Volatility
You want enough movement for a trade to make sense, but not so much chaos that the edges become meaningless. Big volume near the boundaries can warn that a breakout is coming. More stable participation can support repeated swings inside the box.
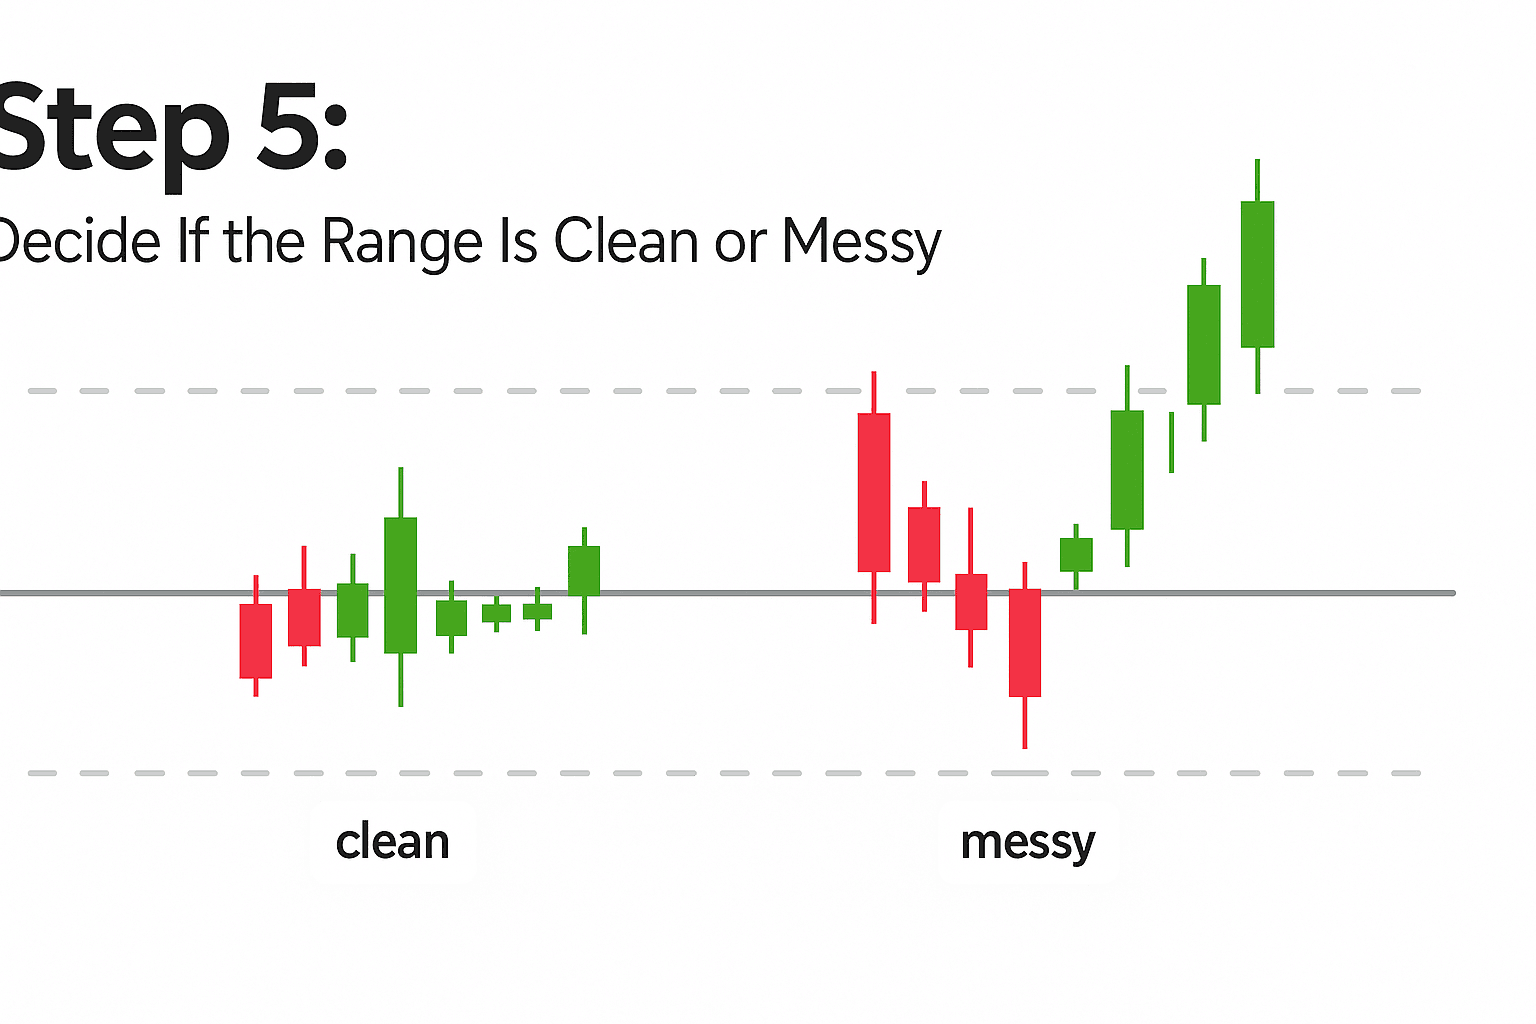
Step 5 - Judge Clean Structure Versus Messy Chop
A clean range has clear reactions near the edges and reasonably smooth travel between them. A messy one keeps poking through both sides and chopping around the middle. Those are harder to trade with consistency.
Planning the First Trade
Entry Near the Lower Boundary
A standard long setup is to buy as price approaches the range low and plan the exit near the upper band. Avoid trying to catch the exact bottom. Using an entry zone gives the market room to move naturally.
A common example is a long entry near support when RSI is deeply oversold, such as below 30, and price shows rejection. Some traders also check the Stochastic oscillator for the same idea, with readings under 20 used as added timing context.
Stops Beyond the Edge and Targets Inside the Other Side
Stop-loss placement matters a lot here. Put the stop outside the boundary you are relying on, with enough space for normal noise and slippage. Take-profit levels are often set slightly before the opposite edge to improve the chance of getting filled.
Position Size and Account Risk
- Use a small fixed account risk, often around 0.5% to 1%.
- Size the trade from the distance between entry and invalidation.
If liquidity looks poor, reduce size further. That simple approach keeps losses survivable. It also answers a common beginner concern - no, you do not need $25,000 to day trade crypto. The pattern day trader rule applies to certain stock accounts in the US, not to spot crypto trading in the same way. You still need enough capital to manage fees and Risk sensibly.
Risk-Reward Still Has to Work
The geometry of the range has to justify the trade. Risk is the distance from entry to stop. Reward is the distance from entry to target after costs. If the potential upside is too small, the setup is easy to skip.
Limit Order or Market Order
A limit Order gives more control over entry price and can reduce slippage, which is useful near a range edge. A market Order guarantees execution, though it can produce a worse fill. In my own chart testing, limit entries tend to fit this style better, while market orders are more useful for urgent exits.
Breakout Risks and Edge Traps
False Breakouts
A fakeout happens when price briefly pushes outside support or resistance, triggers entries or stops, then snaps back into the range. Thin liquidity, stop hunts, or sudden news can all cause this.
How to Tell a Real Break From a Trap
Watch closing prices more than wicks. A genuine breakout usually shows follow-through and then holds the new side on a retest. If price quickly falls back into the box, the move may have failed.
Volume as Confirmation
Rising volume can support a breakout because it shows broader participation. Weak volume during the move often points to a less reliable break.
Bull Traps and Bear Traps
A bull trap occurs when price clears resistance, attracts buyers, then reverses lower. A bear trap is the opposite at support. Waiting for confirmation can save a lot of poor entries.
Indicators and Tools for Better Timing
| Indicator | Purpose in Range Trading | Confirmation Signal |
|---|---|---|
| RSI | Check momentum near the edges | Oversold near support or weaker momentum near resistance |
| Stochastic oscillator | Help time reversals inside the box | Extreme readings near a boundary |
| Bollinger Bands | Spot price stretch toward a range extreme | Price touches an outer band near support or resistance |
| ATR | Measure whether volatility still fits the setup | ATR stays moderate relative to the box size |
| SMA or EMA | Check if the market is sideways | Flat slope with frequent price crossings |
| VWAP or OBV | Add fair value or volume-flow context | Price stays near VWAP inside balance, or OBV supports the move at the edge |
RSI and Other Oscillators
The Relative strength index is one of the most common tools for this style. Traders often look for weakening momentum near resistance or improving momentum near support. Readings above 70 or below 30 can help, though they work better when price action already supports the idea.
The Stochastic oscillator and CCI are also used for timing. In a range, extreme oscillator readings can help line up entries with support and resistance rather than forcing trades in the middle.
Bollinger Bands and ATR
Bollinger Bands can show when price is stretching toward an extreme of the range. A touch near the lower or upper side may suggest overextension, though it does not guarantee a turn. ATR is useful for checking whether current Volatility is becoming too large for the size of the box.
Moving Averages for Market State
A flat SMA or EMA with frequent price crossings usually fits a sideways market. If the average is steep and price stays on one side, the market may be trending and a range trade may be lower quality.
VWAP and OBV as Optional Aids
VWAP gives a quick read on fair value during the session, while OBV tracks whether volume flow supports the move. If OBV rises while price presses resistance, the chance of a breakout may be improving.
Is Range Trading a Good Strategy
It can be, as long as the market is actually range-bound and the trader sticks to rules. This approach suits people who like defined structure and clear invalidation. It works poorly during strong trend expansion or headline-driven chaos.
One practical benefit is that decisions are easier to map in advance. The limitation is timing. A trader must judge whether price is likely to stay inside the box long enough for the idea to play out.
Useful Rules Traders Ask About
The 3-5-7 Rule in Trading
There is no single universal 3-5-7 rule across all markets. Different traders use that phrase in different ways, usually as a personal framework for position sizing or trade management. In the context of a range trade, the only safe approach is to treat it as a custom rule set rather than a standard market law.
The 3-6-9 Rule in Trading
The same issue applies here. The 3-6-9 rule is not a formal rule shared across all trading desks or exchanges. If you see it mentioned, check how the person defines it before applying it to a live setup. For crypto, tested rules around entry, stop placement, and risk per trade matter more than catchy number patterns.
Risk Control for Sideways Strategies
Costs add up quickly in a repetitive style like this. Maker and taker fees, spread, and slippage can quietly erode results, especially in tight ranges. Crypto also trades around the clock, and some off-hours sessions show thinner books and rougher execution.
Leverage needs care. For newer traders, spot markets or very light leverage are usually easier to manage. It also helps to set a maximum daily loss and stop trading once that number is reached. Keeping records of entry, exit, fee impact, and execution quality can reveal mistakes that are hard to see in the moment.
Two extra controls help when the market turns uneven. A trailing stop can protect part of the move once price leaves the midpoint and starts pushing toward the far side of the range. Position scaling can also make sense, with a partial entry near support and a smaller add only if the reaction confirms. If drawdown hits a preset limit, stop trading the setup until conditions look clean again.
Comparing Range Trading With Other Approaches
- Manual range trading - aims to capture repeated swings inside a sideways market, with fakeouts and costs as the main danger.
- DCA - fits passive Investment better, though it does not solve active exit timing.
Trend-following works better when Momentum is expanding. A grid system can automate range behavior, though strong directional moves can drain it fast. For beginners, higher-timeframe manual trading often teaches structure better than jumping straight into automation.
Main Range Trading Strategies in Crypto
Most setups fall into two broad styles. Mean reversion tries to buy support or fade resistance when price keeps respecting the box. Breakout anticipation is more defensive inside the range, with the trader staying selective near the edge and preparing for the moment price starts accepting beyond it. Grid trading is a more automated version of range behavior, but it still depends on the same structure holding up.
Could This Style Fit You
This approach suits traders who can watch charts with some consistency and who are comfortable following rules near the boundaries. Shorter timeframes need more attention, while 4H or daily charts are easier to manage around a normal schedule.
It also helps to practice first with paper trades or backtesting. That lets you test support and resistance reactions, review fills, and build confidence without rushing into live risk.
FAQ
Is This Suitable for Complete Beginners?
Yes, if you start small or use paper trading first. Focus on one chart timeframe, simple rules, and firm stop placement.
Which Coins and Timeframes Work Best for Practice?
High-liquidity markets such as BTC and ETH are usually the cleanest place to start. Many beginners find the 4H and daily charts easier to read because the noise is lower.
How Often Do Ranges Fail and What Should I Do Then?
Every trading range eventually ends. If price starts holding outside the boundary, close the idea and reassess the new market structure rather than forcing the old one.
Can Bots Help With This Style?
Yes, grid bots can automate buy-low and sell-high behavior inside a box, while DCA bots are more suited to steady accumulation. Either way, the range still needs limits and shutdown rules for breakouts.
Which Stats Matter Most?
Win rate, profit factor, and drawdown are useful performance checks. I also like to review how often slippage changed the planned outcome, because execution quality matters a lot in a sideways strategy.